Here’s how to replace your Tesla Model 3 air filters with aftermarket HEPA filters
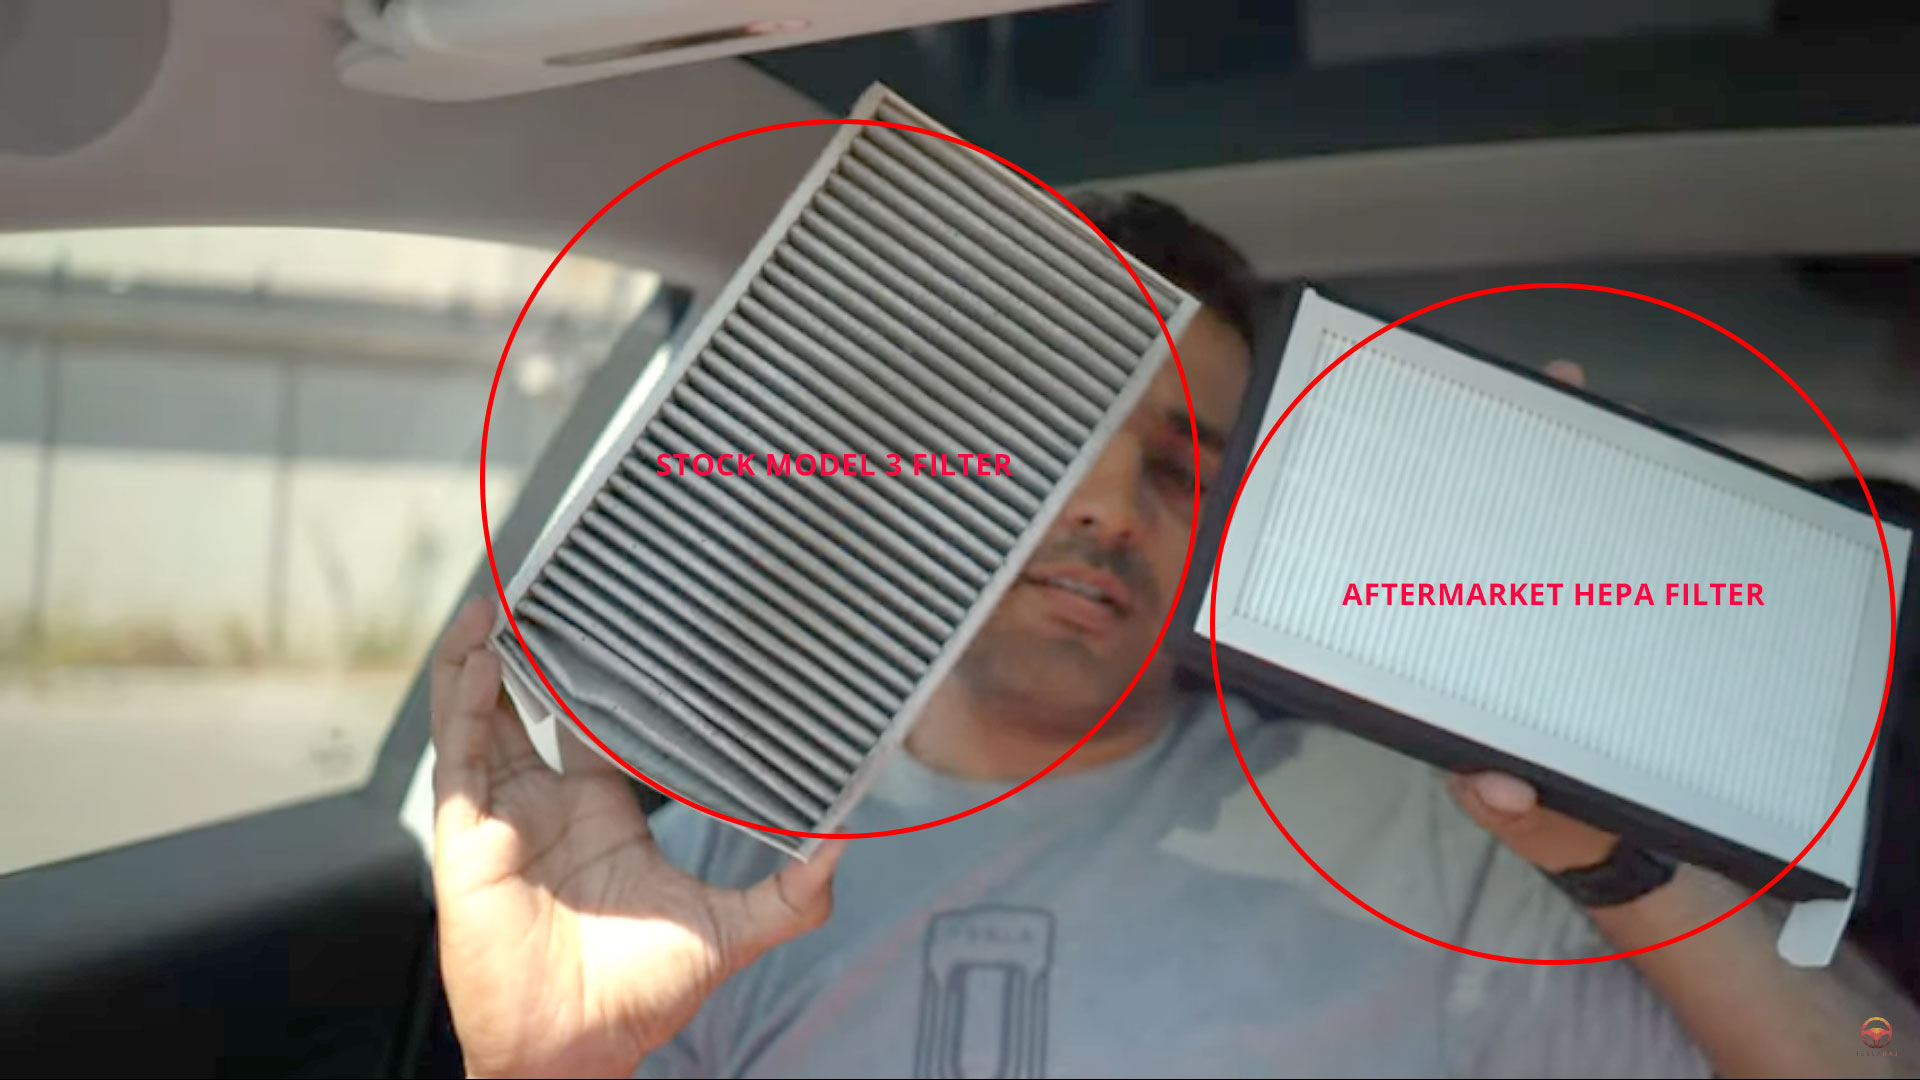
While Tesla Model S and Model X have one of the best high-efficiency particulate matter (HEPA) air filters in the entire automotive industry, Tesla Model 3 also has a good air filtration system, being a smaller car than the S & X, the filters are comparably smaller in size and do not have the HEPA filtration capability.
In the following video, Tesla Raj takes us on the journey on how to remove the stock non-HEPA Tesla Model 3 filters and install the new aftermarket HEPA filters to further increase the cabin air quality of the car.
Last year when the California wildfires took the region with a storm, Tesla Model S and Model X’s Bioweapon Defense Mode actually helped people escape and reach a safe destination from the thickly smoked air of the burning woods.
Removing and re-installing the Model 3 air filters requires some technical experience of handling the tools, working with nuts and bolts, and removing the clips, etc. Raj was fearless enough to be able to attempt this on his beautiful car (Step-by-Step guide from the Model 3 owner’s manual also below).
Note: To directly jump to the ‘How To Remove’ the Model 3 filters, jump to 8:30 in the video.
To get the best results from the stock Tesla Model 3 air filters, Elon Musk communicated the following instructions in a tweet:
Set air flow to recirculating mode & manually raise blower speed to 5 in Model 3 for best air quality. Air filters are smaller than S/X, so clear air is achieved by circulating through filter several times.
Tesla Model 3 not having HEPA grade filters installed right from the factory might have to do with the additional cost and sourcing issues it adds to the manufacturing process, the pair of HEPA filters installed by Raj in the above video cost ~$100 and if this has to be installed in 500,000 Model 3s, only the filters would cost around $50 million dollars (excluding the economies of scale of course, still expensive).
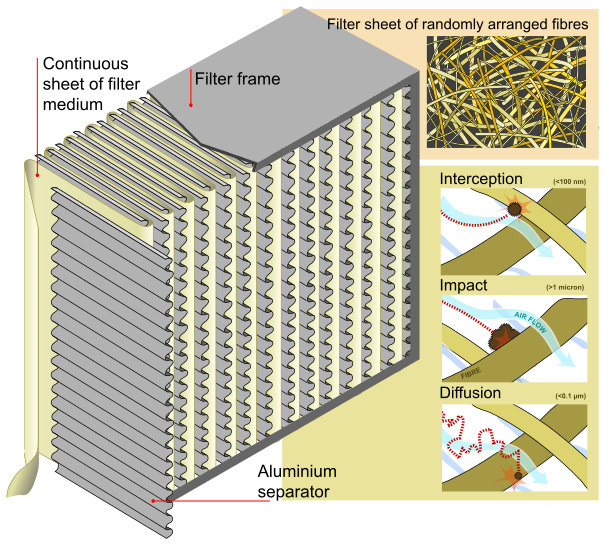
HEPA filters perform exceptionally well in cleaning out particulate matters under 2.5 micron, that includes bacteria, allergens, soot/smog, and even 0.01-micron viruses, great for the health of Tesla owners who live in more polluted cities with high PM levels.
There’s no better feeling than breathing fresh clean air!
Update: OEM Tesla Model 3 air filters are now available in the Tesla store
Step-by-Step Guide: Replacing Tesla Model 3 Cabin Air Filters

- Turn off the climate control system.
- Move the front passenger seat fully rearwards and remove the front passenger floor mat.
- Working from top-to-bottom, use a trim tool to carefully release the right-side panel from the center console.
- Use a clip pry tool to carefully release the push clips that secure the front passenger footwell cover to the instrument panel. Then, while supporting the footwell cover, disconnect the two electrical connectors and move the footwell cover aside.
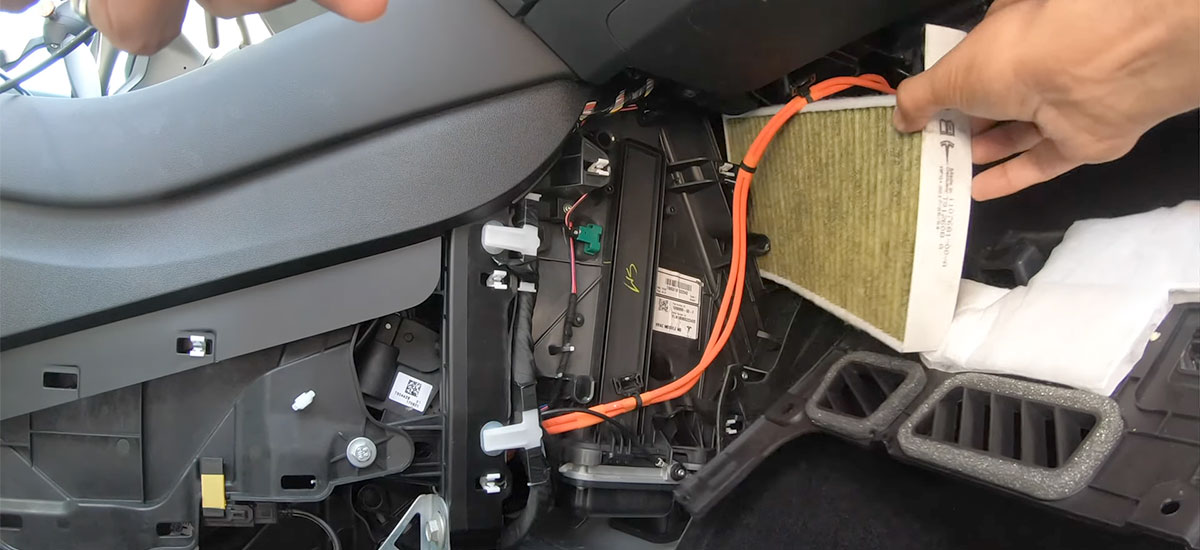
- Remove the T20 screw that secures the cabin filter cover to the heating, ventilation, and air conditioning (HVAC) module then release the cabin filter cover and move it aside.
Note: If the HVAC module does not have a cabin filter cover, reinstall the trim panels and contact Tesla.
Warning: Do not stretch, bend or otherwise damage the orange High Voltage (HV) cables that are attached to the cabin filter cover. If the HV cables are damaged, immediately discontinue this procedure. HV shock can result in serious injury or death.
- Fold the upper cabin filter’s tab upward and the lower filter’s tab downward.
- Holding the tab on the upper cabin filter, pull the upper filter out from the HVAC module.
- Holding the tab on the lower cabin filter, pull the lower filter upwards and then out from the HVAC module.
- Ensuring that the arrows on both new filters face towards the rear of the vehicle, insert the lower cabin filter into the HVAC module and lower it into place. Then, insert the upper cabin filter above it.
- Fold the tabs inward so that the cabin filter cover can be installed.
- Install the cabin filter cover by engaging the lower cover tab then securing the T20 screw using. Tighten the screw to 1.2 Nm/0.89 ft-lbs.
- Reconnect the two electrical connectors to the components in the front passenger footwell cover, then resecure the cover with the push clips.
- Align the right-side panel with the front and rear locator slots on the center console, then apply pressure until all of the clips are fully secure.
- Reinstall the front passenger floor mat then move the front passenger seat, back into place.
Source: Tesla Support
Follow us on Google News ![]()


 Warning: Do not stretch, bend or otherwise damage the orange High Voltage (HV) cables that are attached to the cabin filter cover. If the HV cables are damaged, immediately discontinue this procedure. HV shock can result in serious injury or death.
No Comments